Let’s make a Rangoli
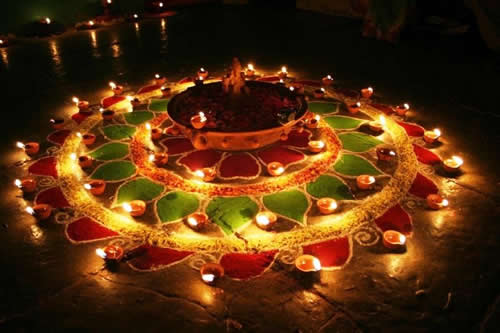
Diwali is known as one of the most pompous festivals. It is a festival of lights and joy, a pandemonium of a festival of festivities and moreover it is a festival that brings out the good in you. It practically brings out the good in you in every sense, right from the customs of washing away your sins to helping your mother in the household chores to unleashing your creative side and turning your home into a decorative arcade. Speaking of creativity, most of us also become overnight artists and fill our pavements with accrue of beautiful rangolis.
As a child, I was always very keen on watching my mother make different shapes and scenes with a handful of powder. The end product was so delightful especially with the diyas lighting it up. Those were the days I learnt the art of making a rangoli just like my mother and I suppose most of you reading this article also must have. Well conventionally this is a woman’s art, haven’t seen many guys engage in it. It isn’t as easy as it seems. It may come across as sprinkling some powder no different than sprinkling a pinch of salt in your food but it is way more than that. I am thus tagging it as an art piece, a work of ambidextrous cooperation and thoughtful sketching.
For any art it is necessary to have the right background for it. Some people make it directly on the floor, but most people enhance its beauty by giving it the brown mud base. This creates a certain adherent surface for the rangoli powders to stick onto it. Also it makes the colors look brighter. Once the base is created, you need to have the right colors with just the right texture. Using colors directly from newly bought packets isn’t a good option since it becomes difficult to sprinkle as also makes the rangoli appear as unfinished. Hence, mix these colors with white powder in the right proportion till you observe a significant color change into a much more lustrous sheen. Now comes the main task of imagining a scene and first sketching it out with a chalk and later fill in the colors within the outlined borders. Make sure that you create large sections and not miniscule parts so that it is easier to shade. Choose only colors that act as contrast to the brown mud base so that they don’t blend in with the background. Filling in the colors must be done with artistic work and play of your index finger and thumb. It helps to put in thin layers for fleshing out the borders. This art of mastering a rangoli appears easy to learn but goes ballistic when put to application.
These days there are many new and easier ways of producing this art. Like singers can now cut and paste various audio clips and merge into the final song, we can use cut outs of various designs available in local markets and simply fill in colors in the gaps to get the final rangoli. Stencils are available in various sizes and shapes. There are porous containers that help create a dotted impression of the rangoli. And of course there are the famous rangoli stickers which can be used as an easy way out to replicating the art form.
Being an ardent follower of this art, I would recommend everyone to bring out the artist in you and carry the conventional tradition of handmade rangolis. It still beats all those rangolis created with stencils or stickers. A little mix of creativity and a little blend of effort can help one create one of the most enticing rangolis.


